
A non-slip stair strip is not a tape, what about exactly?
Wait a minute, the article is about the different versions of anti-slip stair strips, right?
Yes, I will also explain that, but then I must first tell you that an anti-slip strip is very different from an anti-slip tape. There are many types of tapes for sale that have an anti-slip effect, but are not anti-slip strips.
The difference between the two versions is in the surface, the composition of the material and the thickness of the material. Due to its thickness, a non-slip tape is not very suitable for use on your residential staircase
A non-slip tape is very thin (approximately 0.3 mm). The top layer is usually made of an abrasive grain glued to a paper backing and provided with a thin adhesive layer. The quality and durability are determined by a certain composition.
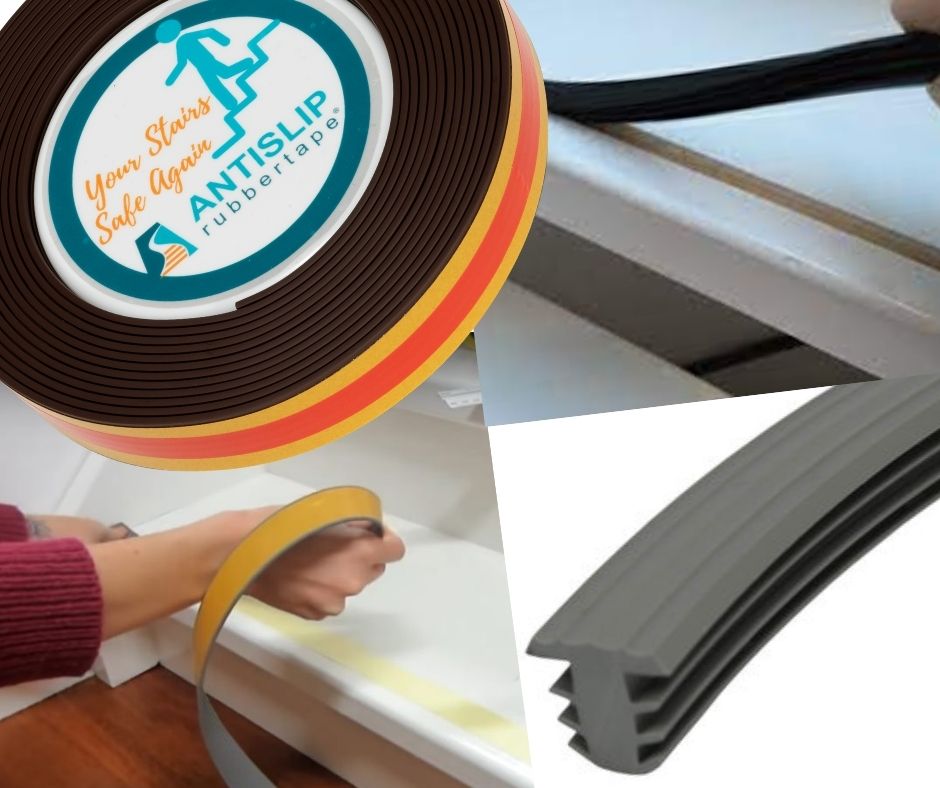
Well having said this, we are now going to talk about the 2 anti-slip strips options that are currently for sale and the differences between these 2 products.
- milling anti-slip strip
- non-slip stair strip self-adhesive
The milling stair strip
The milling anti-slip stair strip has been around for a long time, it is the traditional strip that has been used by the stair maker for a long time. The stair profile is a T-profile and is available in various sizes, such as models that are suitable for stair renovation, overlap steps, solid wooden stair treads or marble steps. A T-profile must be clamped in a small groove, then milled into the stair tread. A small groove is made in the stairs with a special milling machine where the anti-slip stair strip is clamped.
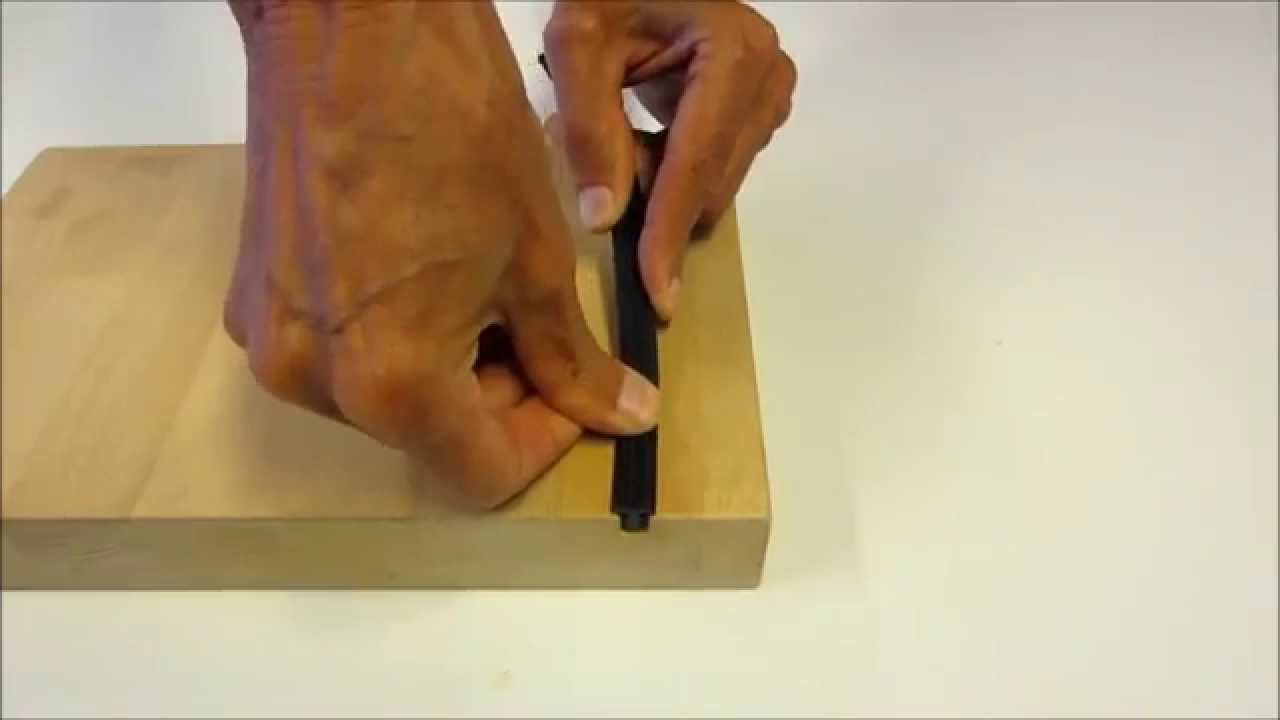
The material of this milling profile is made of a very strong plastic PVC, the profile is provided with small ribs and protrudes approximately 1.5 mm above the tread surface. This gives it a very good anti-slip effect. The stair maker usually makes a groove in the step so that you can paint the stairs.
A big advantage of this strip is that if it is worn out, or if you want to repaint the stairs, you can easily remove the strip from the groove and put it back again after painting. If you want to place a new anti-slip strip after painting, make sure that the new strip is processed at room temperature. Cut the strip half a cm longer and with a sharp knife cut off the corners at the end for a good connection. Clean the groove well so remove paint and dirt residues! You can easily tap the strip into the groove with a rubber hammer or a hammer with a wood bobbin.
Non-slip stair strip self-adhesive
The anti-slip strip with an adhesive layer is a fairly new product (developed in 2014) because anti-slip tapes are not the most ideal solution for a residential staircase, (think of wear quickly, sharply on your socks /feet, difficult to stick straight and neatly, easy sliding) is the self-adhesive anti-slip strip developed.
The material is just like the milling strip of a plastic PVC with a mixture of an elastomer for strength and to make this strip a bit more flexible. The self-adhesive strip is made in a width of 28mm to give the most optimal grip for every foot. If you have a staircase with no groove in the step, you can apply this self-adhesive strip.
Do you want to paint the stairs but is there already a glued strip on your stairs? Then you have to remove this self-adhesive strip first. Painting over the strip will not give a good result, the paint does not adhere well to this strip, it is better to remove the strip and place a new strip after painting. The anti-slip strip with an adhesive layer can easily be removed with a painters hair dryer you make the strip warm so that the strip is removed more easily and you do not pull paint. If adhesive residue remains, remove it with wd 40 and a green scouring pad. Sand and degrease the step before giving it a new coat.
If you are going to apply new self-adhesive anti-slip after painting, wait a few days for the paint to dry properly. Make sure that the strip is flexible before applying, this can be done by letting the strip come to room temperature, or by making the strip flexible in warm water. To apply the strip in a nice straight line, you can clamp a wooden slat with 2 glue pliers. Maintain approximately 1.5 cm from the front of the step. With a paint roller you can press the strip well for a good result.
Frequently read blog articles:
- Painting your stairs as a renovating project
- Create an industrial look for your stairs
- Paint your stairs in a concrete look
Blogwriter: Dennis


Comments
Login to give reaction Your comment will be posted as soon as it is approved.